Showing posts with label creative. Show all posts

Wednesday, July 28, 2010

Gotta Love Freebies!

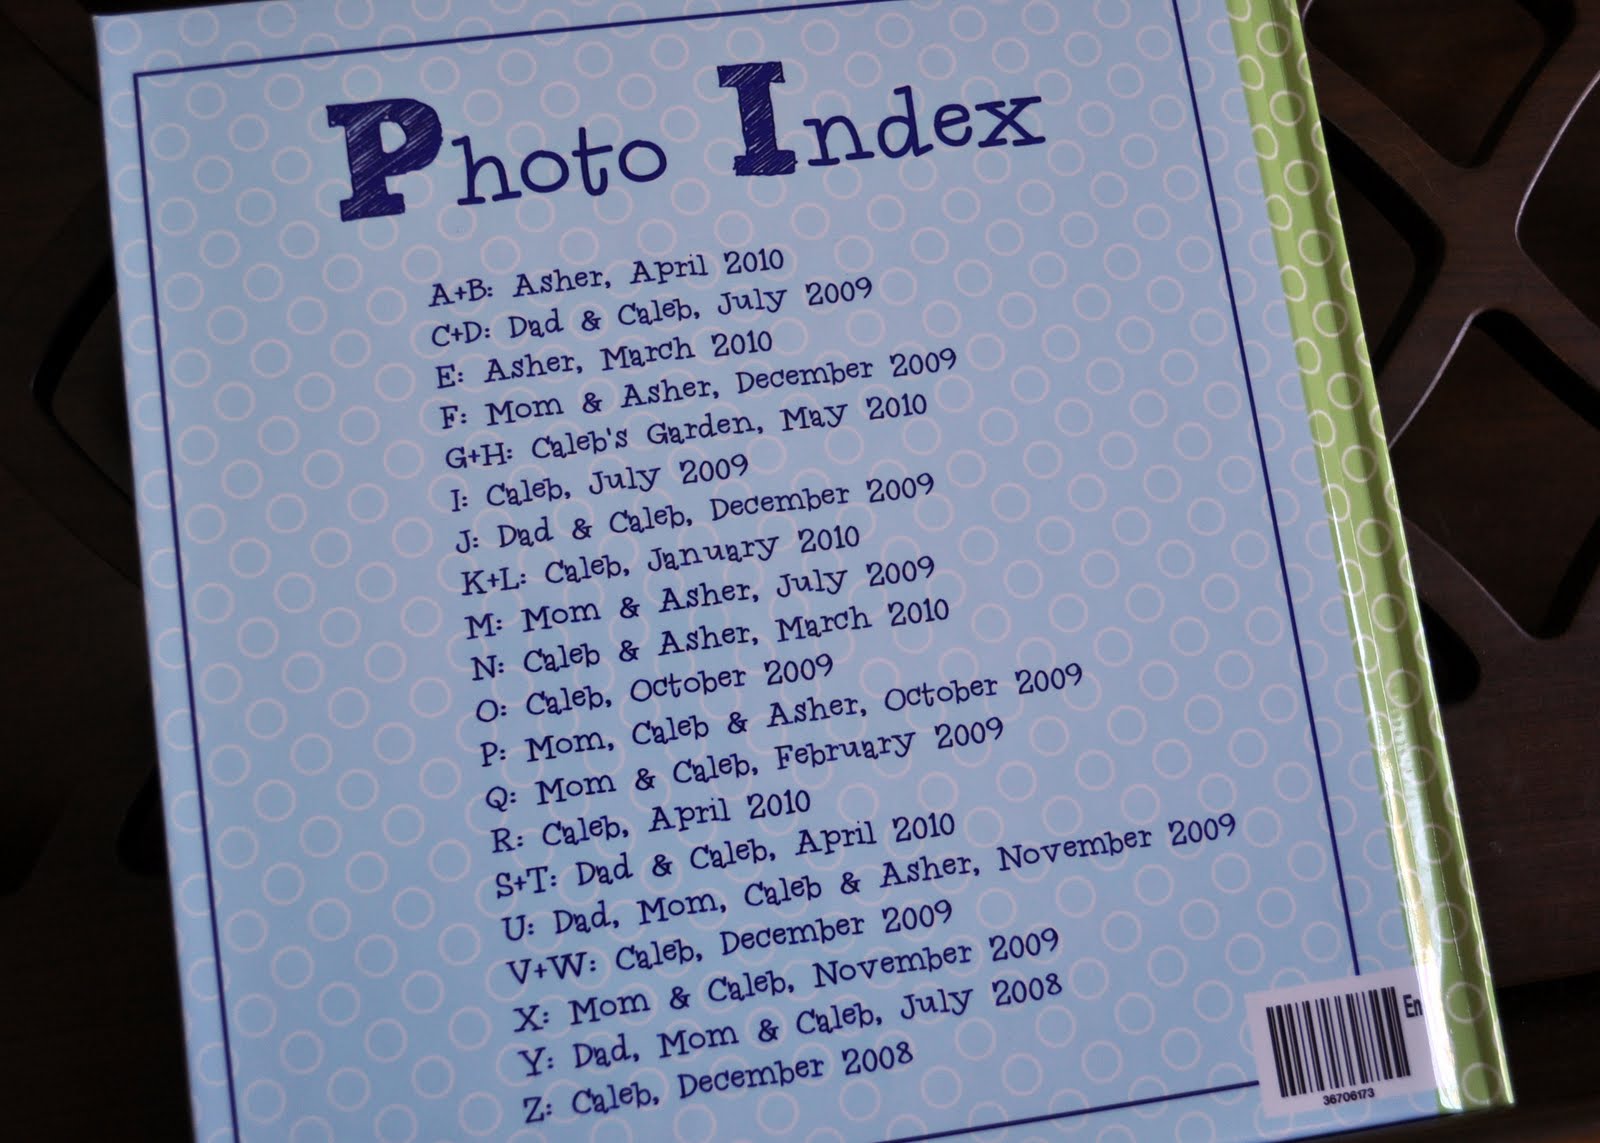
Sorry to burst your bubble, this is not a giveaway - just wanted to show off a photo book I was recently gifted.  A friend of mine sent me a coupon for a free 8x8 photo book from Shutterfly.  I decided to turn my freebie into an alphabet book for my boys (two toddlers).  Instead of using their templates, I designed full pages to upload.  I was crunched for time to design it so I opted for a simple background.

I chose three pastels for background colors, contrasting darker colors for the text and then designed a few simple patterns to lay over the pastels (open circles, open stars, open diamonds and open squares).


I wrote out a list of words that start with each letter of the alphabet, words that mean something in particular to my family.  I waded through 2 years of photos to find some that would fit at least one word for each letter and then narrowed it down.  Because it was only a 20 page book, I had to put two words to a couple of photos.  For example, I used this photo of my older son picking strawberries out of his garden and called it "G is for garden, H is for harvest".


After completing the pages, I designed a simple cover page and back page using the same colors, patterns and fonts.  The back page is a photo index so as the boys grow we will remember when each picture was taken.


I'm thrilled with the way it turned out.  Although it was put together quickly and I wish I had more pages, it is a very special book that the boys already LOVE to read and will be with us for a long time to come.


Friday, June 11, 2010

One Little Candle


When I first designed my One Little Candle birthday invitation, I had no idea what a hit it would be!  I remember sitting on the couch with my husband (after wrestling our two boys to bed) and this card just flashed in my head - I hopped if the couch and said "I have this great idea!!"  Grabbed a piece of paper and scribbled it down quickly before heading to bed.

This card has been HOT.  I have been so blown away by the response I've had - it has been so much fun to create everyone's birthday invitations and to see their own babies grow through the last year.

These are some of my own designs that you'll find in my shop for different holidays:

Little Pumpkin for the fall babies:

 Little Snowflake for the Winter babies:

Another option for winter babies, the Winter ONEderland:

New for 2011, Little Lovebug
(lovebug clipart by Jessica Weibel at jddigidesigns.com)

Also new for 2011, Little Valentine

Also new for 2011, great for little boys - Little Heartbreaker

I've had a few customers want some creative and unique changes to the card so I wanted to share some of their fun ideas...

A new poem provided by the customer:

Something summery to match the wording provided:

A second birthday invitation:

I actually loved the idea of a second birthday invitation so much that I made a whole listing for it!  You can find it here.

a first birthday announcement to share the year with family and friends:

for a bowling party:

A Mickey & Minnie Mouse themed party:

Sunday, April 18, 2010

Creative Touches - Floral Design

Inspired by arrangements I found in Creative Touches, a book my mom gave me years ago when I was first married, I went out this weekend to buy some fresh flowers and greens for my home.  Usually I just buy fresh cut flowers from Whole Foods or our local farmer's market.  This time, I did things a little different.

Contemporary Elegance
This would make a fabulous Mother's Day gift, hostess gift or even baby/bridal shower decorations!  I actually made two of these arrangements, one for the family room and one for my bedside table.


WHAT I USED
3" potted Parade Rose
4.5" cylinder clear glass vase
green moss
rafia

WHAT I DID
I placed the potted roses in the cylinder vase (still potted) and stuffed moss down around the edges to cover up the plastic pot the roses are in.  To finish it off, I simply tied a bit of rafia around the vase!  It was super simple.  I think this arrangement would look great with most potted flowers or plants, I just happened to find these roses on sale!


Serene & Sophisticated
I went to the market with a picture in mind of an all-green arrangement with very specific foliage that I wanted.  Of course, they didn't happen to have anything I had in mind!  This was a last minute plan that I put together while browsing all my options.  I really wasn't sure about it at first but it's definitely growing on me!


WHAT I USED
white rectangular vase - $12 at Michaels (4" W x 4" D x 12" H)
cut flowers and greens in different textures and shades of green


WHAT I DID
At the mouth of the vase, I placed baby's breath so it was just popping out the opening.  From there, I layered lady's mantle and then lime green chrysanthemums.  I topped off the arrangement with a spray of bear grass.

Monday, April 12, 2010

Tutorial: DIY Earring Display & Organizer

Three or four years ago I came across an article in Real Simple on how to make your own earring display for your dangly earrings.  Perfect!  My dangles were always getting misplaced or wrapped up in each other.  So that weekend, I purchased the supplies and set my husband to work (yes, I could have done it myself but he was more than happy to help!).  I love my earring display and have been using it ever since!


WHAT YOU NEED

  • wooden frame (without glass or backing) - we used a shadow box and carefully broke the glass out the front of it
  • piano wire
  • small eyelet hooks (two per wire)
  • pliers
  • ruler
  • pencil
WHAT YOU DO
Using your pencil and ruler, mark where you want each wire to hang. Screw in the eyelet hooks. Using the pliers, pull the wire taut and twist it around the hooks.


Hang your earrings from wires.  The frame can sit on a dresser or hang from the wall.

Saturday, January 9, 2010

DIY - Gift Tags

Every January, I sit down and sift through all the holiday cards I received that year.  I keep all the photo cards and letters in a scrapbook (labeled by year) because I love to look through them year after year.  The store-bought holiday cards always end up in the recycle bin.  But this year, I decided to get some use out of them!  In just a short time, I cut them up into gift tag sized cards and strung them with ribbon to be used on next year's gifts.  I made 21 unique gift tags for $1.09 (could have been half that cost if I wanted just one color ribbon!).  What a deal!

What's great is this can be done with any cards you receive - why not make your own birthday/Valentine's/New Baby tags this year?  Here's how:

What You Need:

  • cards to be re-used
  • scissors or paper cutter
  • hole punch
  • ribbon (1/8" wide) cut into ~ 7.5" lengths

What You Do:
1. Using a paper cutter, cut off the front of your holiday card. (Recycle portion with greeting inside.)  Look carefully at your card to decide what image/words you'd like to include in your gift tag.  Cut the card into gift-tag sized squares or rectangles.
2. Using your hole punch, punch a single hole in each gift tag - either in the corner of the card or in the top center.
3. Take your ribbon and fold it in half.  Tuck the folded part through the front side of the card.


4. Brings the ends up and through the loop in your ribbon.


5. *voila!*  Homemade, money-saving, unique gift tags!  Write your to:/from: on the back side and attach to your gift.